Tuesday, August 4, 2009

Rediscovering 17mm

Mami_Nene_Washington_Capital

So, I was on vacation with the family in Washington, DC. While I always love being on vacation with the Familia I also use these opportunities to take pictures...something I can never get enough of.

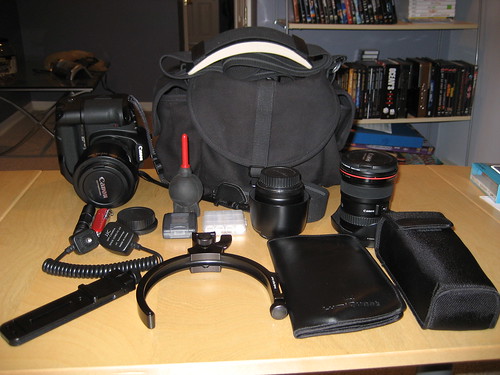
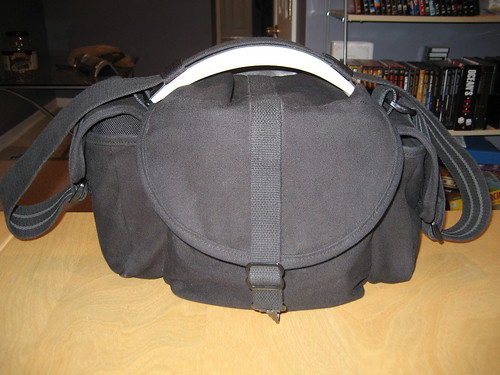
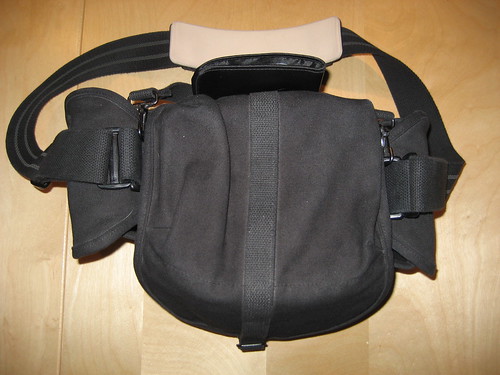
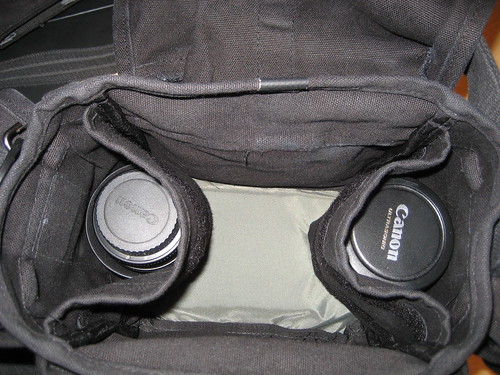
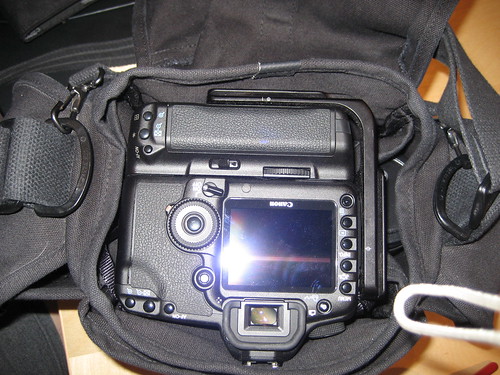
I went with a straight forward kit consisting of the below, taking some things I knew I would need and others I hoped I would use.

- 5D Mark II
- 24-105 f/4 L
- 17-40 f/4 L
- 70-200 f/2.8 L
- 580 EX II
- Tripod
- Other misc. items like batteries, etc.

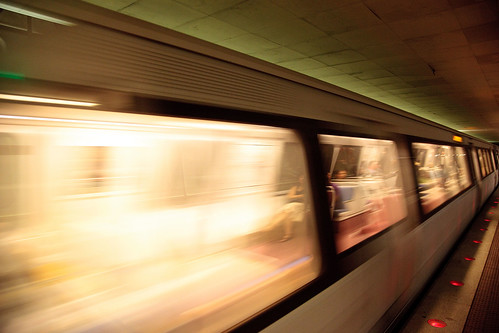
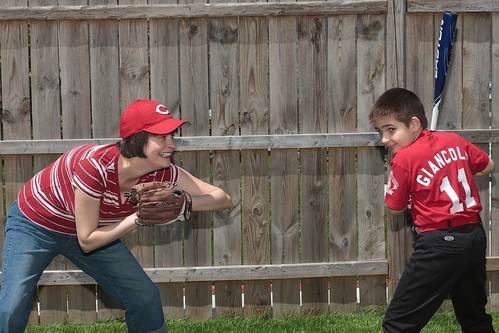
Now, I knew I would use the camera, duh, and the 24-105 as it is a great travel lens so that was a given. However, I had my doubts about the 70-200 and the tripod. I was pleased I got to use the 70-200 even though it was only once, but I did. I did not get to use the tripod, no surprise, I brought it for night photography but was too tired after all the walking during the day to go back out at night.

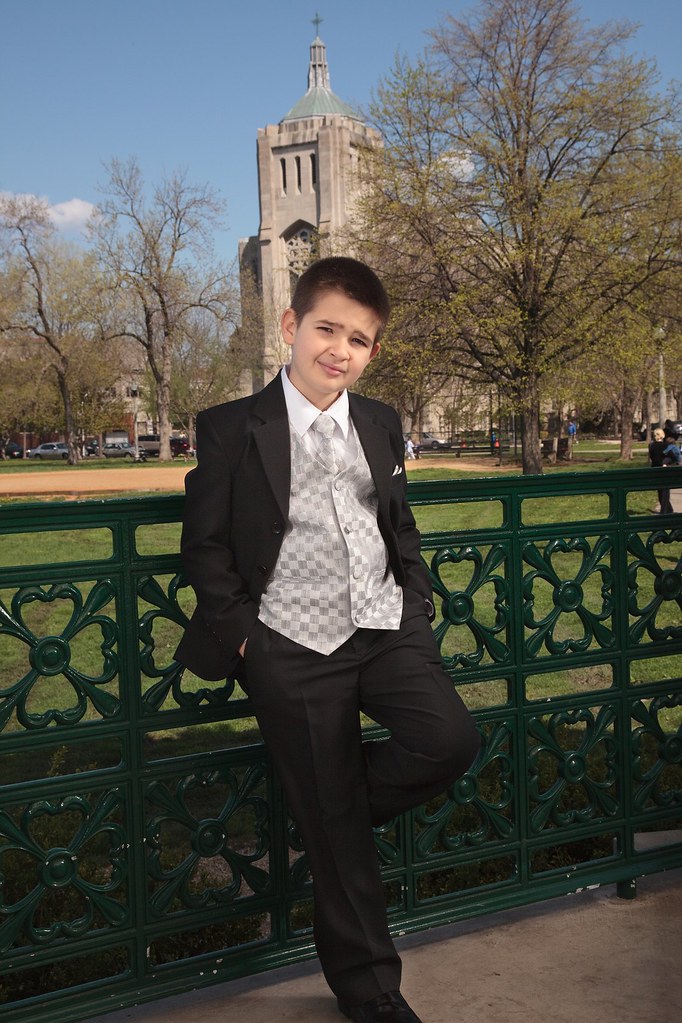
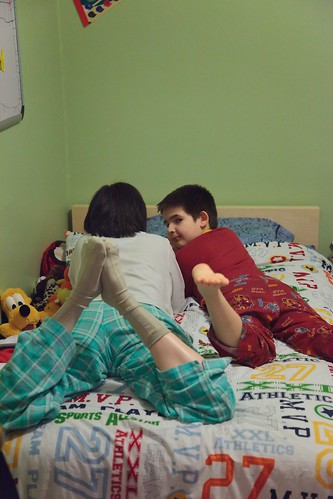
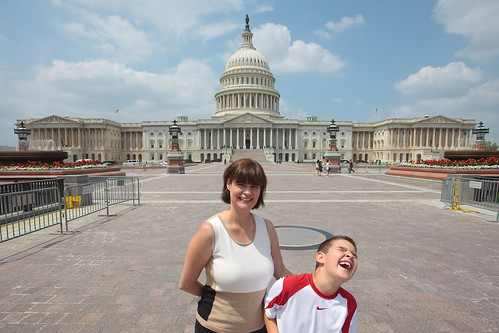
What was a pleasant surprise was my 17-40, a lens I've always enjoyed but don't get to use as often as I like. It has been months since I had a need for it and I new I would need it when indoors at the various Capital Buildings and Monuments, but boy did I forget what it can do in the simplest of applications. Take the picture above as an example.

Its a simple portrait of my wife and son standing in front of the US Capital Building. Using a standard range lens I would have to back up quite a bit to get them in the picture, resulting in a lot of useless space a need to crop, etc. With the 17-40 on I was able to get nice and close, keeping them as the center of attention while getting the whole Capital Building in the background. Short of a a slight angle fix (something a lot of my pics from the trip needed - I seem to have been tilted the whole time) has no cropping, you just have a love that about a lens.

So my wish for everyone is that you go out and use a lens you have not touched in a while. Force yourselves to do so. You know why you love these lenses and why you keep them, you just need to go and remind yourselves by seeing some real world examples.

Oh, and have fun.

Sunday, July 19, 2009

Picture a Week Project - Week 10

Metro

Washington DC Metro

I find myself saying for the second time that it has been far too long since I posted to the project. Dustin Diaz and his Daily Picture Project are putting me to shame. May I be worthy. :-)

Regardless...

Above is a shot I took while on vacation with the family last month. Was standing in the metro station in DC playing with settings and got the above. My objective was to capture the movement of the train and bring out some drama in the lighting, etc. What does everyone think? This is not an award winning photo by any means but does it stir anything up in you?

Love to hear your feedback.

Week 9: Eyes Have It

Tuesday, June 30, 2009

Domke F-3x Review

I have been wanting to post my opinions of this bag for sometime as it has been grab and go bag for sometime. Let me give one caveat to start. This is not a professional product review, it is my review of how I use the F-3x, nothing more. I will discuss how I load it, etc. so read on if you find such things interesting.

We all know about the pluses of Domke bags. The durability, flexibility, room, etc. is almost legendary, and if you don't know about these things Jon at POTN will gladly remind you. What I want to discuss is what fit in this Tardis like bag (that was for the Dr. Who fans out there). So lets take a look at what this bad boy can do.

Lets start with a shot of everything I load in it as my grab and go F3-x. (Excuse the pictures, batteries in my 40D were dead so I used my wife's P&S)

Unloaded

Here is where everything goes.

Main Compartment:
  • 5DII with grip and L-Bracket attached
  • 24-105 f/4 L hood reversed attached to 5DII
  • 17-40 f/4 L in wrap around pouch
  • 85 f/1.8 hood reversed in wrap around puch
Front Compartment:
  • Hood for 17-40 f/4 L
  • RRS B87-B flash bracket
  • Extra AA batteries
  • Memory cards
  • Body & Lens cap
End Compartment #1:
  • 580EX II
End Compartment #2:
  • Pocket Knife
  • Flashlight
  • Rocket Blower
  • ETTL cord courtesy of FlashZebra
  • Glasses
Back Compartment:
  • Lumiquest ProMax System
Here are two shots of it loaded up.

Front:

All Loaded

Top:

Top

Everything fits well and access to the items is very easy. Only catch is that I must remove the 5DII to get to my other lenses. But that is not an issue since I only need them when changing lenses so the 5DII is already out of the bag.

And for everyone's reference here is a shot of the F-3x with the main compartment open, just so you can see how things look.

Extra lenses only:

Main Compartment Lenses Only

With 5DII:

Main Compartment Loaded

I have to be honest that it took me some time to come to this configuration. I started out by not pushing the bag any and as a result what I fit in it was limiting. However, over time I found myself adding this then that, and eventually learning the beauty of a Domke, its ability to continue to take what ever you throw at it. In fact, I'm sure I could fit more if I really wanted to.

The only thing to be aware of is that the bag can get heavy fast as you continue to load it up. That is what led me to get a Postman's Pad. The pad is amazing, it makes carrying the bag no matter how full a breeze.

One question I often get is if a 70-200 will work in the F-3x. I'm sure it would, but I have to be honest in that when I use my 70-200 f/2.8 I move to my F2. I like the extra room.

I hope you find this useful. As I mentioned the purpose of this post is not be a formal review but to provide an idea of what can fit in the F-3x. I guess the final question is "would I recommend this bag?" My answer...without a doubt!!!

Monday, June 29, 2009

Letting Go...

There is an old joke in photography that goes something like this...

A man is standing with his wife watching a beautiful sunset. They are lovingly looking into each others eyes when in the golden sunlight his wife says with a soft tender voice, "I love you." At this moment what is going through the man's mind, "I love you too", "You are wonderful", or other such niceties, nope. Instead, he is thinking 1/125th at f/5.6.

Its a fun little joke, but shows how many of us are constantly thinking of our art and not the moment. Here is where I would normally leave all of you to reflect on the need to let go and recognize where you are, blah, blah, blah. But nope, this is where I tell myself to recognize where I am, blah, blah, blah.

Today is my 13th wedding anniversary. I have been married to the most wonderful person imaginable for 13 years, it is hard to believe that she has tolerated me for so long. :-) In a tender moment this evening we sat down with our 8 year-old son to look at our wedding pictures. There was oohing, ahhing and fond memories galore. Through it all what did I do? Let me tell you, I kept looking at the pictures thinking that the backgrounds were underexposed and the poses were poorly executed.

Not only was I thinking this but I made the mistake of mentioning it to my wife. How stupid could I be, I was essentially implying that she did not look good. How dumb could I be? As you can imagine, there was back peddling and many assurances that she was in fact beautiful...which is no lie by the way. I even went as far as to say the photographer probably underexposed the background in order to draw attention to her. I think that one might have worked...ok it didn't. :-)

So the lesson for me is to let go of my obsessions and live in the moment. Being a photographer is fine and I do love it, but being a good husband is much more important to me. So honey if you are reading this, I love you and thanks for putting up with me for all these years. I hope to one day earn the love you shower on me so freely.

Wednesday, May 27, 2009

Picture a Week Project - Week 9

Eyes Have It

Eyes Have It

Had an opportunity this past weekend to hook up with my best friend and his family. Why is this special? He has been living in Europe for the past 4 years and I have not had the opportunity to meet either of his children. So when we got together at the park I of course brought my camera.

The shot above is his oldest son. The shot is far from perfect and is not nearly as sharp as it should be if I were on my game, had the camera in One Shot which does not allow for moving children. Grrr. :-) Anyway, this little boy's eyes just jump out at me. The are large bright and expressive. So this weeks post is dedicated to this little lad with the big expressive eyes.

I will have to make the time to photograph him again some time. There are stories to be told in the eyes.

Week 8: Baseball Fun
Week 10: Metro

Wednesday, May 20, 2009

Picture a Week Project - Week 8

Baseball Fun

Baseball Fun

So my wife walked up to me and said that she needed a quick portrait of our son in his Little League uniform. No pressure....

Furthermore, we had to do the shoot in our back yard in bright sunlight and no shade. Oh, and there was no time to setup lightstands, etc. so there was no chance of overpowering the sun with one speedlight. My goose was cooked.

Anyway, the pictures turned out okay even though I wasn't able to eliminate shadows completely. I was even able to get over my frustrations to take a couple fun pics, the above being my favorite. So what did I learn, to get past myself and my need to do things certain ways and just enjoy the moment. When with family that is the most important thing after all.

Week 7: Confidence
Week 9: Eyes Have It

Tuesday, May 5, 2009

Picture a Week Project - Week 7

Confidence:

Picture a Week Project: Confidence

I'm so happy!

This past weekend was my son's first communion which gave me the opportunity to hold a portrait session in front of the church at a gazebo at the local park. I was excited I would be shooting on a sunny day but in a shaded area, how would I approach this? Hmmmm, let me think...photographic geek-type excitement.

I ended up using two speedlights. One was camera right at full power shooting into a silver lined umbrella and the second was camera left gobo'ed to prevent lens glare and shooting at 1/16th. Both were gelled with a 1/4 CTO to match the sun and give the subjects some warmth.

In general, I'm very pleased with how these turned out. There are a few rookie mistakes, my son was moving around not keeping the church in a consistent postion and I managed to cut off part of his foot in the shot above, but again, given how hard it is to keep an 8 year-old still I'm very pleased. On a side note, this was the first shoot I've done with him where he didn't use the standard all teeth smile which anyone with kids knows is phony and reveals nothing about the subject. This time we were able to get an expression which reveals a bit of his nature. I think I'm starting to get over the hump on this issue. The title for this post comes from his expression, he just has an air of confidence...it seemed to just work.

Let me know what you think, and please share your experience as well.

Week 6: Pride
Week 8: Baseball Fun

Tuesday, April 28, 2009

Picture a Week Project - Week 6

Pride:

Picture a Week - Pride

Alright, it has been far too long since I posted to this project, I've been bad, I'm very sorry. However, this past week I was finally able to get out and do some shooting and was able to capture the below. Woohoo, I finally held a camera again.

The above is a shot of my son at a friend's 1st communion party. I call this shot 'Pride' as it reminds me of one of those shots of a restaurant owner in front of his life's work. Now, my son is not a restaurant owner, he is only 8, but the expression on his face is a break from the normal teeth grin he usually provides and the smirk or half smile is as if he knows something I don't - which by the way is probably true.

The shot was executed simply with an flash and flash bracket set to vertical mode. I was playing around with him getting him to the point where he was about to poke me or toss something at me, those things an 8 year-old does, everyone with children know what I'm talking about. It was at the point he thought I wouldn't take the picture that I did. The processing was minimal just a bit of color boost.

As usual, take a look and let me know your thoughts.

Week 5: Victory is Mine
Week 7: Confidence

Thursday, April 16, 2009

iPhone Shots

Sunset

I acknowledge that have a project going on now, the Picture a Week Project, however, I am having such a good time with the iPhone and the post processing that can be done with it, I decided to upload any pictures I take with it to Flickr.

There are only a few rules.
  1. The picture must be taken with my iPhone.
  2. Any post processing must be done in the iPhone, no use of Lightroom or Photoshop.
  3. The images must be uploaded right from the iPhone to guarantee they have not been touched on a PC.
So stop by and take a look now and again. To view the iPhone set on Flickr, Click Here.

Oh, and I do want to give a quick thank you for the inspiration to do this to Chase Jarvis. Chase is doing a wonderful iPhone Project and has inspired me to do mine. Not that my shots will be anywhere as good as what Chase creates.

Wednesday, April 15, 2009

iPhone Picture Quality

photo

Well I've been out playing around with my new toy a bit and am enjoying the heck out of it. One thing I have noticed is that the many comments andcriticisms about the camera are justified. It is limited in pixel count, is horrible in low light, etc., etc.

However, given all the software (discussion to come later on that) which is available for post processing right on the iPhone makes for some very usable results. The above is an example of my son and which was post processed in the iPhone and uploaded right to Flickr. Using the basic photography mantra of know your gear and its limitations I think I ended up with a usable picture which is sort of fun with the balloon and boarder added. This is a first pass and very rough but I think representative of what can be done.

So, stay tuned, more to come on this and other things as I play more and more.

Tuesday, April 14, 2009

iPhone Goodness

Ok, caved..I bought an iPhone. I didn't think I would like it as much as I do, but this thing is fantastic!

I have a lot to learn but am finding the flexibility amazing. I fact out of tribute to this device I'm doing this post from my iPhone...how coolis that.

Anyway, I will be posting more on the device, apps which are useful, so stay tuned.

I know there are a ton of posts like this, but I'm a geek and this thing is so cool.

Mobile Blogging from here.

Wednesday, April 8, 2009

Gel Holder

IMG_1238

With 3 speedlights and several gels for each I needed to come up with a way to carry them around. Something simple yet effective. So here is what I came up with...

Lets start off by talking about what I have to carry. I carry the following which you can multiply by 3 for a total of 24 gels. (You can pick all of the below cut for your speedlights from PhotoGels.com.)

  • Full CTO
  • 1/2 CTO
  • 1/4 CTO
  • Full CTB
  • 1/2 CTB
  • 1/4 CTB
  • Full Plusgreen
  • 1/2 Plusgreen
  • 1/4 Plusgreen
So how could I carry it? First a discussion of the mechanics of attaching the gels to the speedlight. Actually, this is easy enough, I put velcro on the gel and use a speedstrap to attach it to the speedlight. Why is the important you ask, because in my DIY gel holder that velcro will also keep the gel in place there. Again, simple enough, no rocket science.

With the above, lets get on to the actual holder. The concept is to use a day planner and use adhesive velcro to attach the gels, one gel type per open page set. Very simple but very effective. Below are a few shots of the planner with different gels so you can see how it all comes together.

1/4 CTO:

IMG_1239

Full Plusgreen:

IMG_1241

1/2 CTB:

IMG_1240

As you can see, it makes identifying the gels to use nice and easy and with the velcro in place I am able to transfer them in and out as needed without fuss. There is only one challenge I have faced with this system. The planner gets very thick due to the added bulk of the gels and velcro. It could be easily overcome by using a bigger planner but I wanted to go no bigger than what would fit in the end pocket of Domke bag. Hence, my setup looks bulky, but it is light and plyable, easily used and carried. However, in the spirit of full disclosure below is a picture of the holder on its side so you can see the thickness.

IMG_1237

Anyway, take a look and give it a try, I think you'll find it usable. More importantly, if you have any gel holder ideas let me know about them. I'm always looking to improve my systems.

Friday, April 3, 2009

Picture a Week Project - Week 5

Victory is Mine!

Victory is mine!

Well, I've been bad. I didn't get a picture last week to post. Work has been insane and well, that is how I pay the mortgage.

I decided to dig into my archives and see what I could find. The above is a picture taken at the Bristol Renaissance Fair outside of Chicago in August of 2008. I've always liked how this turned out just do to the bit of drama picked up. Not a lot to say, this week I'm merely sharing a picture I've always enjoyed.

As always let me know what you think. I will be better next week, I promise.

Week 4: Tired
Weel 6: Pride

Friday, March 27, 2009

Picture a Week Project - Week 4

Tired:

Plain Tired

It has been quite a week. Work is killing me but I don't want to lose focus of my project commitment. So when I saw this picture after shooting some pictures of my son's Track-A-Thon (a fund raiser for his school) where he gets pledges to run around a track, racking up the dollars, I knew I had my picture for the week.

The above was taken at lap 68 with a minute and a half to go. My son committed to running 70 laps. Ya know what, in the remaining minute and a half he did it, he completed 70 laps exactly. He taught me a lesson, no matter how tired more can always be done. (I acknowledge this sounds a bit like a sports gear add.) Relating this to myself, no matter how much I'm working I can always shoot and find pictures which make me reflective, which teach me something, which force me to grow in something I love.

So while this weeks post is short, take a look and reflect about your passion, do you have the time, do you make the time, will you hit your 70 laps no matter how tired you are?

Week 3: Reading
Week 5: Victory is Mine!

Monday, March 23, 2009

Picture a Week Project - Week 3

Reading:

Wanted to look at things a bit differently this week. Having started shooting back in the film days I was taught to always try and solve all issues in camera, to have the picture as taken represent what I want it to be. As a result it has always been a bit of a struggle for me to see an existing image differently as the result of post processing. This is due to my taking it as I want it to be and why you often see me saying that a picture required very little post processing.

When my wife and son were reading this past weekend I took the opportunity to take a quick shot as I thought it was cute how they were laying on the bed. Below is the picture I intended it to be, a nice traditional snap shot.

Jessie & Gustavo Reading

It is what I meant, clean and simple with a little bit of a knowing look coming from my son. Its that look where he is telling me to leave him alone and stop taking pictures already. :-) Yes, he is my favorite subject.

It was the look that made me consider another take on this picture. Looking at pictures processed at the dawn of color film and the styles of the 70's street photographers I thought that a LOMO based look with higher contrast and muted colors would be interesting. Below is what I came up with, a LOMO version of the same picture.

Jessie & Gustavo Reading LOMO

I'm not sure I'm in love the the above, but it is different and demonstrates as with last week's picture, that I'm seeing more than I initially would, this makes me very happy. Anyway, let me know which rendition you prefer, I'd love to hear the feedback.

Week 2: Transformer
Week 4: Tired

Friday, March 13, 2009

What The Duck


Been wanting to let everyone know about the cartoon strip 'What The Duck' for some time now. Published by Aaron Johnson this is a very entertaining look at photography illustrating its humor through our main protagonist, a duck...yes, I said a duck. Personally, I find this the perfect parody as photographers love to test new equipment by taking pictures of ducks. I don't know why this is, but its fun and makes for a great comic strip in Aaron's capable hands.

You can find information on 'What The Duck' by clicking here. If you want Aaron also publishes a weekly YouTube animated strip. You can find all the strips by clicking here.

Below is his most recent post on YouTube, enjoy....


Wednesday, March 11, 2009

Picture a Week Project - Week 2

Transformer:

2009 Stingray

Okay, I'm not a guy that is excited by cars. They are nice to have, but I don't spend much money on them nor am I usually impressed by them. When I buy a car I buy it for utility, not because it is fast, or cool. Strange as this is to my family, I come from a family of car mechanics, a profession to which my Father and Brother both belong. So when my wife and I went to the Chicago Auto Show this year it was to research a new car purchase, not to just look around. As my wife will attest, I'm very task oriented at this type of event going with a list of cars to look at and as usual I wanted to review those and then leave. Nothing surprising, its my MO.

Then something unusual happened. I was walking by the GM display and came across the new Stingray concept car. It caught my attention, but not why you might think. I kept thinking how much like a Transformer (yes the Hasbro toy) the car looked...so I started taking some pictures. It didn't disappoint as the tail light reminds me of the eye, as if the Transformer is looking at me. I had a vision of the environment being dark with light showing the contours of the car. All of the above was done with available light and the only post processing I did was to boost the blacks a bit to darken the non-car areas of the shot.

What I like is that this showed that I was seeing something for more than it appears to be at first glance...seeing what something could be. To me this demonstrates that I'm using a new part of my brain, being less rigid than I normally am. So thanks to a car, something I'm normally not excited by, I've expanded and grown. Thanks GM. ;-)

As usual, take a look and let me know what you think. You can find the full gallery of Transformer shots on Flickr by clicking here.

Week 1: Three Friends
Week 3: Reading

Tuesday, March 3, 2009

Picture a Week Project - Week 1

Three Friends:

Three Friends - Week 10


This is a picture that revealed quite a bit about the subjects to me. The shot is of my son Gustavo (center) and two of his best friends. The one on the right and my son are very close, they call each other best friend and how they are leaning into each other is typical. They have a genuine concern and caring for each other, typical of an 8 year-old friendship.

However, its the boy on the left that brings the story to the picture. He is a best friend of my son as well, but is a very independent spirit. He's a great kid, but you often see in his affect that he is independent and does not need anyone, that he is here by choice and could leave at anytime. He adds the character to the picture. The stark contrast of the two that cannot be separated juxtaposed to the one that is fiercely independent is fascinating to me.

I kept the processing simple, just doing some high contrast black and white. It allows the picture to remain simple while naturally placing the two close subjects brighter than the one off to the side. It just seemed to inherently exemplify the contrast (no pun intended) between the two themes.

Anyway, let me know what you think, the shot is far from perfect, but the story it tells is compelling to me.

Week 2: Transformer

Sunday, March 1, 2009

Picture a Week Project - Introduction

Work has is very busy lately and I find my shooting has decreased to the point where I find it concerning. Thus the Picture a Week Project is born. The projects objective is simple and while I intend for this to the first of many projects, it is the first so I need to make my goal achievable.

The idea is not to force myself to try new things as ideas are not the issue, but to force myself to take pictures. That is what I need right now, I need to take pictures plain and simple. This does not mean there are no parameters or controls to the project. The pictures have to meet two criteria.
  1. It got me out to take the picture.
  2. An either or...
  • That it tells a story about the subjects. or...
  • That there is a story as to how the picture came to be.
To me photographs are about stories so that is the purpose, that there be a story and I get off my duff and take some pictures.

So sit back and enjoy and let me know your thoughts. Also, don't be shy about letting me know when I'm late getting up submissions. I'll need your encouragement to make this happen. I look at this like a weight loss program but in this case I want to lose spare time not weight.

Click Here to see the Flickr pool of images.

Thursday, February 26, 2009

New Pocket Wizards

Well, I'm excited about the new Pocket Wizards and their ability to support ETTL. However, I learned of a serious concern. Apparently when using them with a 580EX II, 430EX II or 430 EX the range of the triggers is limited to 50 feet. This is a pretty serious issue for me. 50 feet is not nearly enough. I'll continue to monitor this but it is something that would make me go with RadioPoppers over the Pocket Wizards.

Also, I learned something new about the RadioPoppers this week. Seems with a PX transmitter you can get High Speed Sync even when using JrX receivers. This is very exciting as it allows a step into a high value (at least for me) feature without having to shell out for the PX receivers initially.

I'll let everyone know what I continue to find out.

Friday, February 20, 2009

Now I'm confused


Well, I know I need TTL metering and High Speed Sync with any remotes I purchase, so I had resigned myself to the fact that I would need Radio Poppers. Well, of course now I have options. Pocket Wizard announced this week that they have TTL compatible remotes for Canon and Nikon coming out in March. Just great. :-)

These things look fantastic as they don't need wires to attach to a flash nor do they need to mount over the infrared sensor like the Radio Poppers. They simply mount using the hot shoe adapter. Further, they have a feature called Hyper Sync which essentially allows the sync speed of your flash to increase. For example you can get a Canon 1D Mark III to sync at 1/500 of a second, very cool in deed.

There are two models, the MiniTT1 which is mounted on the camera to control remote flashes and the FlexTT5 which can be a transmitter or receiver. With the FlexTT5 you can control your camera as well. With prices being $199 for the MiniTT1 and $219 for the FlexTT5 you just can't go wrong as they come in cheaper than the Radio Poppers.

Well, take a look at them with the links above and let me know what you think. You can also see the Strobist review of these by clicking here or Chase Jarvis discussion by clicking here.

Now I have to make a decision. Great, just great, I hate making decisions.

Thursday, February 5, 2009

Shooting in the Mountains


Picture a Week Project - Week 9

Meant to post this some time ago, but hey, I'm finally getting around to it.

I took this shot while on business travel in Phoenix. I like to take one body and a walk around lens with me on all trips. My hope is that I will get out in the evenings to take some pictures and relax. While I'm not usually able to get out, given late work nights, this was a happy day where I did.

So I get in my car, not knowing Phoenix at all, and started driving about. I ended up in Scottsdale, a suburb of Phoenix and stumbled upon the above at sunset. Trust me this was luck, I'm not good enough to be in plan for this sort of event on purpose. After all Ansel Adam's moon picture was a happen to come across a moment photograph, so I figure I'm in good company. (No, I'm not comparing myself to Ansel Adams, I'm just saying we were both lucky once.)

Taking out my trusty camera I snap a few hand-held shots which with very little processing (bumping the darks and boosting vibrancy) I end up with the above. When I return home and process the images I'm thrilled. What more could I hope for.

Here is where it gets fun. I was on the phone with some co-workers in the Phoenix area, telling them about my excursion. They are thrilled for be but had one question. "Did you see any snakes or scorpions?" Snakes & scorpions I ask, you have to be kidding? Let be set the record straight, I'm a city guy, I have lived in major cities most of my life and always find it a bit strange to not have concrete around trees. So you can tell me about roaches and I'm fine, but snakes and scorpions, I don't think so. Apparently, snakes & scorpions are very common in Arizona. In Chicago we get roaches while they get scorpions in Arizona. That confirms it, I'm never moving to Arizona.

So why did I post this picture? Because its pretty? Nope! Because I learned a lesson taking it. The lesson being that I should pay attention to my surroundings, keeping myself aware of what is going on around me. Every time I see a sunset or mountain photograph I think of this lesson and smile. It was a good trip, a good trip in deed.

Have any of you encountered this lesson? If so, let post your experience, I would love to read about it?

Thursday, January 29, 2009

L-Bracket Heaven

So I finally knuckled under and got an L-Bracket for my 5DII. Thanks to my friends at POTN I was referred over to the folks at Really Right Stuff who make some fantastic products.

You might be wondering what the purpose of an L-Bracket is. Its a good question. But also a very simple one to ask. An L-Bracket is designed to keep you lens over the center of the tripod head regardless of shooting in Landscape or portrait mode. The prevents the camera from hanging off the side of the head, creating more stress on the head and most importantly prevents the aspect of the shot from changing. In one simple change you are able to move the camera from one orientation to the other and still have things line up. If you want a nice review of the L-Bracket advantage go check out this link at Really Right Stuff.

On to what I got...

I decided to use the L-Bracket on my 5DII only as my 40D is for sports and I don't currently have a pressing need for an L-Bracket. Since I always shoot with a grip I got the BGE6-L model which places the bracket comfortably on the camera with the grip attached. Below are a couple pictures of the bracket on the camera. (Note: I took pics myself, but the below from RRS are much better so I'm linking over to them. Thanks RRS!)


As you can see it fits very nicely. I was skeptical getting a bracket as I thought the size and weight would be an issue. Its not! This thing is light and I really don't notice it when shooting. I'm trying to leave it on all the time so I don't have to worry about putting it on when needed. Also, it attaches with a screw on the bottom which would make it a bit tough putting on in a pinch, so leaving it on has benefits.

Now there is one caveat to getting an L-Bracket, you'll need a clamp on your tripod head which can hold an Arca-Swiss type plate. As I use a Manfrotto 488RC2 I needed to make a change as the plate would not work. I ended up getting the RRS B2 LR II which is designed for the Arca type clamps. In the end all I had to do what replace the Manfrotto plate with teh B2 LR II and I was good to go. (Note: If you have a 488RC2 the Manfrotto clamp will be hard to get off as they use locktight on it. Just heat the clamp with a hair dryer to soften the locktight and it will come off easy enough.) Below is a picture of the B2 LR II on my 488.


In the end this setup works fantastic. The 5DII is a dream to mount with the L-Bracket and the clamp is much easier to use than the Manfrotto, I'm very glad I made the change. Let me know if you have any questions on this, I'd be glad to help out where I can.


Tuesday, January 20, 2009

Genius of Photography

Then Genius of Photography is a BBC documentary focused on Photography over the decades. Thanks to Pixsylated I’ve learned that all episodes have been posted to YouTube for general consumption. Those of us in the States will appreciate the importance of this as these have been very difficult to catch as they are so infrequently shown.

So, when you have some time go over to Pixsylated and use the links to get to the series on YouTube. I guarantee that you will find it educational and informative, I sure did.

Well, enjoy and let me know your thoughts, I should have all episodes up in the next day or so.

Click Here to go to Pixsylated’s post on the series.

Sunday, January 18, 2009

Night During the Day

I was board today. Then I found a large icicle hanging outside my dining room window. So I pulled out my 5DII and start to take some shots as I’ve always found the textures of ice interesting. Using the ambient light I got board quick. Then I remembered and article I read on Pixsylated (click here) about using high speed sync (HSS) to turn day into night. So I figured, why not lets give it a try.

Below is what I came up with. I cranked up my shutter speed, closed down the aperture and lowered the ISO to get everything as dark as possible. The only post processing was to boost the blacks a bit and add some sharpening.

I have to say I’m happy with the results for a first attempt. Let me know what you think. After each picture is a shot of how the light was setup. I used my 430EX off camera using my homemade clamp (click here) and triggered it with my 580EX II as a master.

One thing this exercise proved to me was how diminished power is in HSS. Not something I couldn’t work with, but it is much the reason the flash is so close to the ice. I eventually knocked the icicle down by bumping it with the flash, or I would have gotten more shots. ooops!!!

ICE_NIGHT_AND_DAY_2209_01_17-1

ICE_NIGHT_AND_DAY_2209_01_17-2

ICE_NIGHT_AND_DAY_2209_01_17-3

ICE_NIGHT_AND_DAY_2209_01_17-4

You can find the images at my Flickr site if you want to look at larger versions and see the EXIF (click here)

Wednesday, January 7, 2009

Disney Fireworks

Disney Fireworks

I often see people asking questions as to how to shoot fireworks and where to take them when at Disney World in Orlando. Just wanted to take a quick moment to outline some of the places I've found which are good for fireworks shots. I will do a post later on how best to take fireworks shots.

Magic Kingdom:

Approaching Cinderella's castle walking up main street go to the right of it as if you are walking to Tomorrow Land. As you make the turn immediately to the left is a Kodak Picture spot. About 45 min prior to the fireworks the Disney potog will leave and you can walk up to this fence and setup with you tripod. I was there two nights and not many people came up to the area, seems pretty unknown to watch them. Some people will hop the fence after the parade is done, but they don't stay. Each night I was there only one family was next to me, plenty of room for that.

I with I had a pic to post of fireworks from this great spot, but the first night I didn't know we would be there for it and didn't have my tripod and the second it rained like a mad man and I didn't take my gear out so as to keep it dry.

Trust me though, with my 17-55 IS I could have framed the fireworks with the castle on the left and trees below if I wanted and still got all the action. Very nice location.

Epcot:

Go into Italy and you'll find a small Italian style bridge. Pick a spot anywhere on this bridge and you'll be all set. People don't go on to it until right before the actions begins so you'll be left alone to setup. There is an alcove right below it that would also be a great vantage spot but that is where most people hang out and in my opinion it is no better than the bridge and you won't have to fight for real estate.

Below is a pic from the bridge. I am no expert at shooting fireworks and I'm sure this could have been framed/executed better, but it will give you an idea of how clean a view you'll have of the action.

Disney Fireworks


As always, please let me know if there are any questions.

Click here if you want to see all the pictures on Flickr.

Sunday, January 4, 2009

Good Bye Friend


Well I did it. I sold off my trusty 17-55 f/2.8 IS so that I can get a wide angle lens that will work on both my full frame and crop cameras.

This was one of the toughest decisions I have ever had to make. The 17-55 has been an outstanding lens, always delivering top quality pictures, with great color, contrast and bokeh. The fact that it had an f/2.8 aperture and IS only added to the appeal.

I know I'm doing the right thing for my kit and the 17-40 L will be a solid performer with great versatility. But I do want to let everyone know what a great lens the 17-55 is. Don't let the fact that it is an EF-S and non-L scare you away from it. If you have a crop body, get this lens, it is the perfect walk-around for a crop body.

Below are a couple of my favorites from over the past year and a half. Just wanted to share.

My daughter at 4-months:


My daughter at 1-year

Thursday, January 1, 2009

First post of the year


Just want to take a moment to wish everyone a Merry Christmas and a Happy new year. I hope the new year brings all of you prosperity and joy. Above are some fireworks to celebrate 2009 (yes they are from Disney in the summer of 2009, but its all I had) and below is my son with a gift for everyone.


Take care and have a joyous year.